
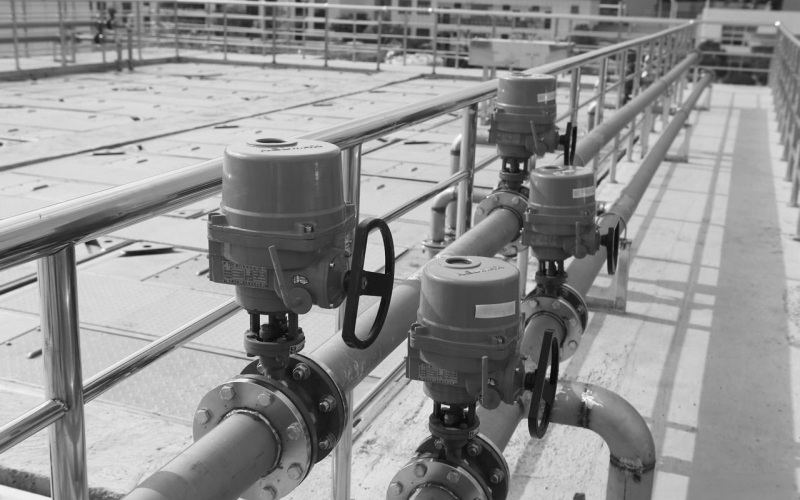
How a control valve is installed decides how reliably it runs for the rest of its life. A valve mounted in the right place, oriented correctly, supported properly and protected from pipe strain will control accurately for years. The same valve, installed carelessly, will hunt, leak and fail early. These practices prevent most of the field problems we see.
Choose the Right Location
Install the valve where it can be serviced. The positioner, packing and trim all need working space. Put it upstream of the flow-measuring element so its turbulence does not disturb the meter reading, and keep it away from strong vibration sources such as reciprocating pumps. In temperature control loops, position the sensing element correctly relative to the valve, downstream of the mixing point.
Valve Orientation
Set the actuator upright wherever possible so its weight does not side-load the stem and packing. On horizontal piping that is natural. Where vertical piping forces a horizontal stem, support the actuator separately. Angle valves may be mounted in any orientation that keeps the trim aligned, per the manufacturer’s instructions.
Flow Direction
Every control valve has a specified flow direction, marked by an arrow on the body. For single-seat globe valves the flow normally enters through the seat, pushing the plug away from it at small openings, which improves stability and limits seat erosion. Do not reverse the flow unless the manufacturer explicitly allows it for that valve type.
Straight Pipe Runs
Turbulence from elbows, reducers and other fittings disturbs the flow profile through the valve and degrades control. As a general rule, keep at least five pipe diameters straight upstream of the valve and three diameters downstream, with no fittings in the immediate upstream area. The exact requirement depends on the valve type and loop design; where space forces shorter runs, check the project specification.
Support and Bolting
The valve body can carry the weight of the pipe, but not the weight of a large actuator hanging on the bonnet. Support the actuator, particularly on big diaphragm or piston units, to avoid bending the stem and loading the packing. Align flanges squarely before bolting, use the right torque in the right sequence, and never pull the pipe into position with the flange bolts. Piping strain on the body is a common cause of sticking stems and leaking gaskets.
Cleanliness and Pre-Commissioning
Flush the pipeline before installing the valve, or protect it with strainers during flushing; weld slag and scale left in the line will damage the seating surfaces on the first stroke. After installation, check the packing gland, stroke the valve through its full travel and confirm positioner calibration before commissioning. A full stroke test at the end of installation catches loose couplings and misadjusted limit switches while the valve is still easy to reach.
Installation Checklist Summary
| Item | Requirement | Why It Matters |
|---|---|---|
| Location | Accessible for maintenance; upstream of meters | Serviceability; stable measurement |
| Orientation | Actuator upright; support if horizontal | Prevents stem side-load and packing wear |
| Flow direction | Follow the body arrow | Stability and seat protection |
| Straight run | ≈ 5D upstream, 3D downstream | Accurate flow control |
| Support | Support heavy actuators | Prevents bending and leakage |
| Bolting | Square flange alignment, correct torque | No piping strain or gasket leaks |
| Pre-commissioning | Flush line, stroke test, calibrate positioner | Catches faults before start-up |
Conclusion
Most installation-related valve problems share the same roots: piping strain, poor orientation, dirty lines and short straight runs. Follow the checklist, accessible location, upright actuator, correct flow direction, straight pipe, proper support and a full pre-commissioning stroke test, and you avoid the large majority of early failures. If the layout is unusual, talk to the manufacturer before mounting; NW VALVE can advise on orientation, support and trim for demanding installations.
 No products in the cart.